DTM WORKFLOW
What You’ll Learn
- How to go from raw LAS or LAZ data to a finished bare-earth terrain model
- What inputs matter most before you start: CRS, point density, and terrain type
- How the DTM workflow changes between desktop software and browser-based processing
- Which QA checks catch bad ground classification before you export deliverables
- Which outputs to generate next: GeoTIFF rasters, slope maps, hillshade, contours, and elevation profiles / cross-sections
Before You Start: What You Need for a Good DTM
A reliable DTM depends more on clean inputs than on post-processing cleanup. Before you start, make sure the source data and output goal are aligned with the job.
WORKFLOW COMPARISON
Traditional Desktop Workflow vs Browser-Based Workflow
The page used to bury this comparison in a dense table. This layout makes the difference obvious much faster.
Traditional Desktop Tools
❌ Install software, manage plugins, and maintain local storage
❌ Tune filters manually when terrain, vegetation, or point density changes
❌ Build TINs or rasters separately, then export each deliverable one by one
❌ Move outputs between GIS, CAD, and teammates by hand
Lidarvisor Workflow
✓ Upload LAS or LAZ in the browser and start from a clean project workflow
✓ Automatic classification separates ground from vegetation, buildings, water, wires, poles, and more
✓ Generate DTM, hillshade, slope, contours, and related outputs from the same processed dataset
✓ Export ready-to-use files for GIS analysis, CAD drafting, and terrain review
Step-by-Step: How to Create a DTM from LiDAR
This fixes the broken 04 / 05 step rhythm and turns the workflow into one clean five-step sequence.
01
Upload the point cloud
Upload your LAS or LAZ file, confirm the CRS, and make sure the dataset covers the full project area you want to model.
02
Classify ground points
Run automatic classification so ground points are separated from vegetation, buildings, water, wires, poles, and other above-ground objects.
03
Generate the DTM
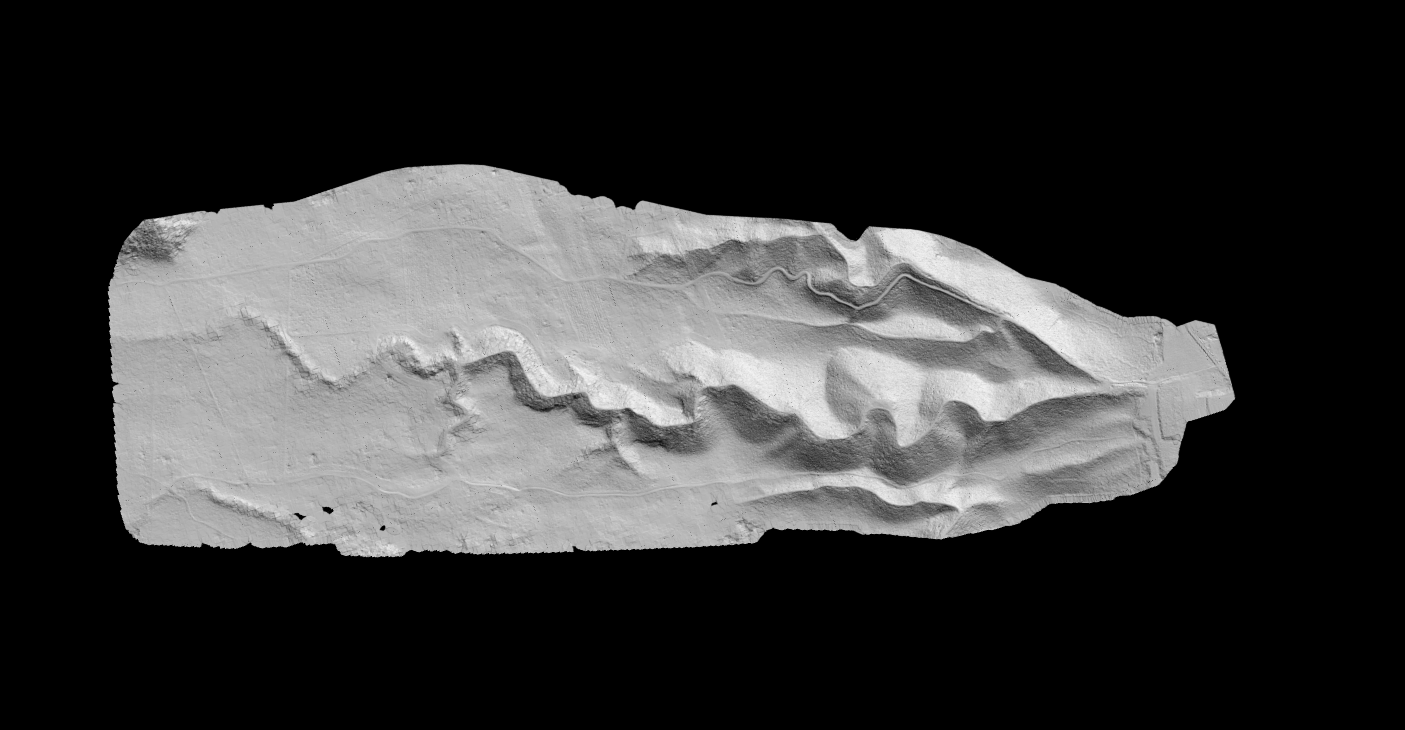
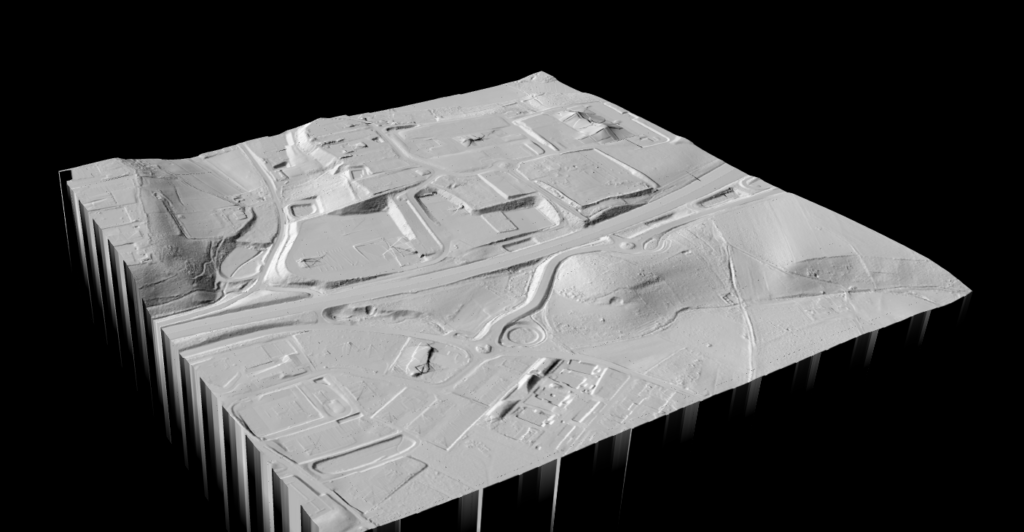
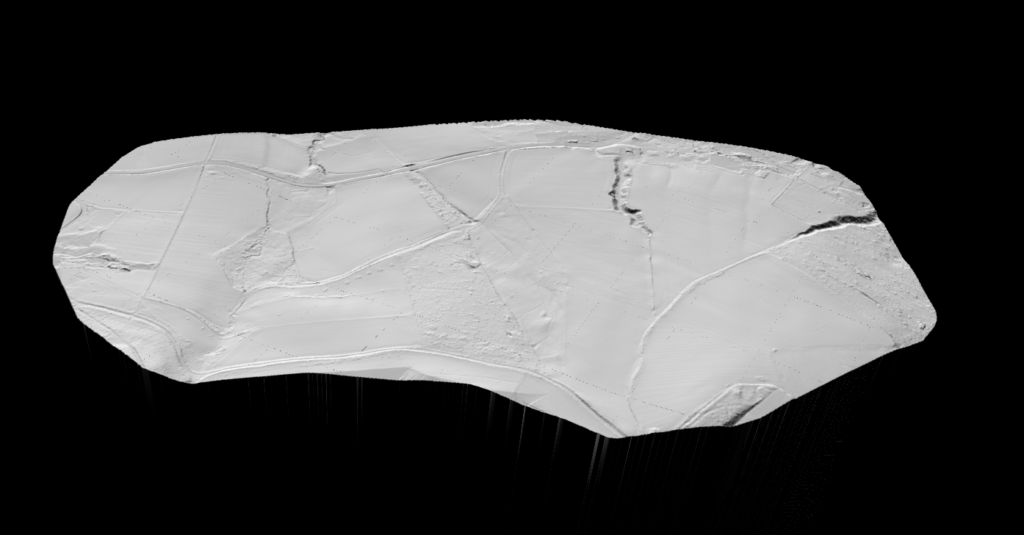
Create the bare-earth terrain model from the classified ground returns, then inspect the surface before you export deliverables.
04
Review terrain outputs
Check hillshade, slope, and visual QA views to catch leftover artifacts before they turn into bad contours or misleading terrain analysis.
05
Export and reuse
Export GeoTIFF rasters for DTM, hillshade, and slope, plus DXF vectors for contours and CAD workflows. If you need terrain review beyond standard maps, use elevation profiles / cross-sections to inspect the model along specific alignments.
QUALITY CONTROL
Quality Control Checklist for a Reliable DTM
A technically correct workflow still needs a fast visual QA pass before you trust the output.
Use the terrain outputs themselves to spot classification failures, interpolation artifacts, or edge issues before exporting final files.
✦ Look for leftover structures, vehicles, bridge decks, and roof fragments in the bare-earth surface
✦ Inspect forested zones first, because weak ground classification usually shows up there
✦ Check water edges and flat surfaces for interpolation noise or misclassified returns
✦ Review contour smoothness and slope continuity before sending files to CAD or engineering teams
OUTPUTS
What to Do with the Finished DTM
A DTM is rarely the final deliverable by itself. It usually feeds mapping, engineering, analysis, and review workflows immediately after generation.
Use the same processed point cloud to generate multiple outputs instead of treating DTM creation as a one-file endpoint.
✦ Export GeoTIFF rasters for DTM, hillshade, and slope analysis
✦ Export DXF contour vectors for topographic mapping and CAD drafting
✦ Review elevation profiles / cross-sections when you need to inspect terrain along roads, corridors, or drainage paths
✦ Reuse the classified dataset for related terrain products instead of rebuilding the workflow from scratch
Frequently Asked Questions
Yes, but the point cloud still needs a classification step first. A DTM is built from ground returns, so vegetation, buildings, vehicles, and other above-ground objects have to be removed from the surface model before you export terrain deliverables.
It depends on the job. Broad regional terrain modeling can work with lower densities, while detailed engineering, contour drafting, and construction planning need denser source data. Match the output resolution to the actual density and quality of the point cloud.
Not exactly. DEM is a broad category for elevation models. DTM usually means a bare-earth surface, while DSM includes buildings, vegetation, and other above-ground features. That distinction matters when you need contours, grading surfaces, or flood-model input.
Yes. Hillshade is one of the fastest ways to spot leftover artifacts before they turn into bad contour lines or misleading slope interpretation. A quick visual QA pass saves time later in CAD or GIS workflows.
You can export GeoTIFF rasters for DTM, hillshade, and slope, plus DXF vectors for contour-based CAD workflows. Depending on the project, you can also review elevation profiles / cross-sections and generate related terrain outputs from the same processed dataset.
Create a free account and turn your LiDAR point cloud into terrain deliverables
Start with 2 GB of storage and process up to 50 hectares for free. Then generate your DTM, hillshade, slope map, contours, and supporting terrain outputs in one browser-based workflow.
No credit card required • 2 GB included on free signup
Related Articles
Terrain Models
• Create Accurate Terrain Models
• Digital Terrain Model Guide
Related Guides
• DTM vs DSM
• Terrain Mapping with LiDAR
Next Step
• Point Cloud Vectorization
• Aerial LiDAR Classification